"Building" a Headlamp Fairing
The big fairing was pretty smashed. I prefer the look of the bike with the smaller handlebar fairing, the plain K100 look. I've heard it referred to as the K100 C, but I think that is informal and borrowed from the K75 C. All manuals and BMW official sites mention only the models RS, RT and LT.
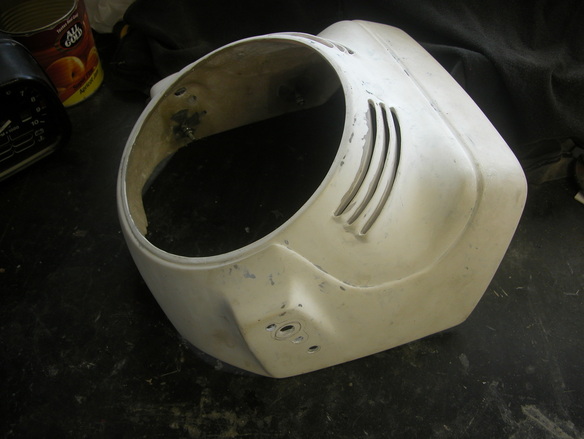
I had this half headlamp fairing. I could repair it, but decided to rather convert it to a plug and take a GRP mold off it. I can then make copies. The other reason is that it was going to be tricky to repair it in such a way that the black insert/surround for the headlamp fits well. It would be easier to create a one piece component.
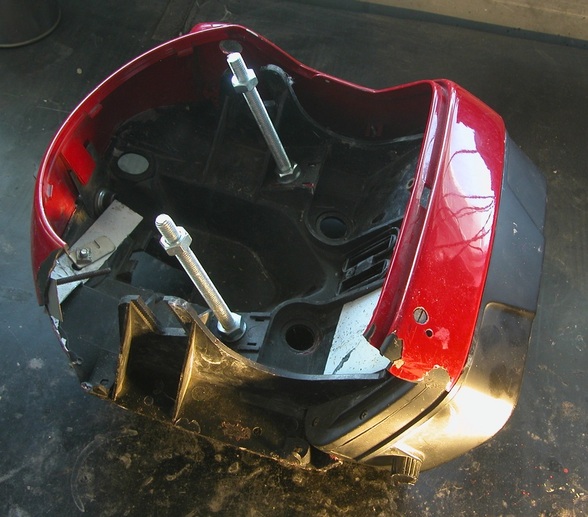
I attached the broken edges to a base with instrument cluster so I had a sturdy structure to start with. The two threaded rod pieces are to hold a plate that would shut off the headlamp hole.
I attached the broken edges to a base with instrument cluster so I had a sturdy structure to start with. The two threaded rod pieces are to hold a plate that would shut off the headlamp hole.

Headlamp surround is fixed in place, glued to the bolted filler piece.
I filled much of the cavity with Styrofoam and covered that with foil to prevent the resin dissolving the foam.
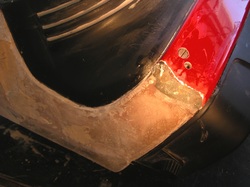
Several layers of GRP. To get a good join between existing fairing and the new piece, I grind down the old fairing a bit less than a mm, drill a few holes and fill the holes with resin and finely chopped glass. The last 2 layers of new plastic is then laid over this.
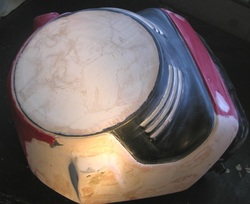
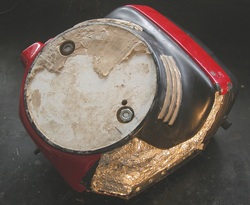
Body filler
Primer
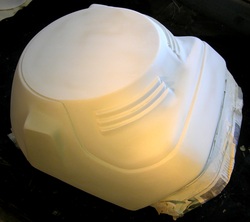
Completed plug, painted and one coat of clear.
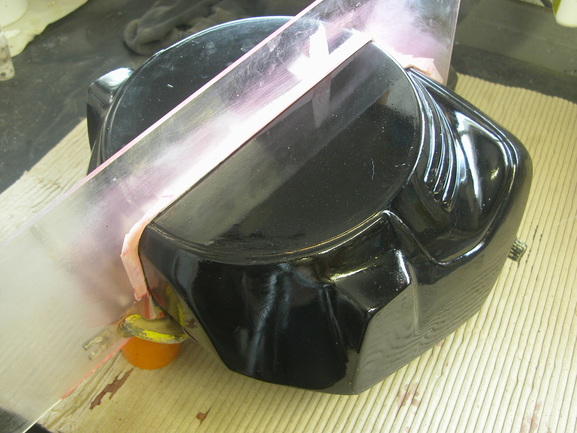
Separation board fixed in position to facilitate the split mold. I cut an approximate profile and filled the gap between the board and the plug with body filler. Then separated the two and sanded the body filler flat with the surface of the perspex. The separation board goes back after 5 coats of wax and a coat of PVA release fluid. The right hand side of the board was taped with masking tape to prevent resin running onto that side while doing the left half of the mold. The release fluid also helps seal the join between mold and board.
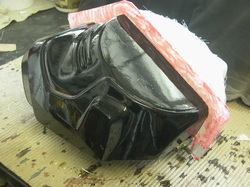
Left hand side of the mold completed and the separation board removed - note the flange along the centre line. I did 1 layer of gel coat, a layer of surface tissue and resin and two layers of chopped strand. After removing the board the right hand side of the mold gets done. Before removing the mold from the plug I drilled holes, about 6, to help alignment and to bolt the two halves together.
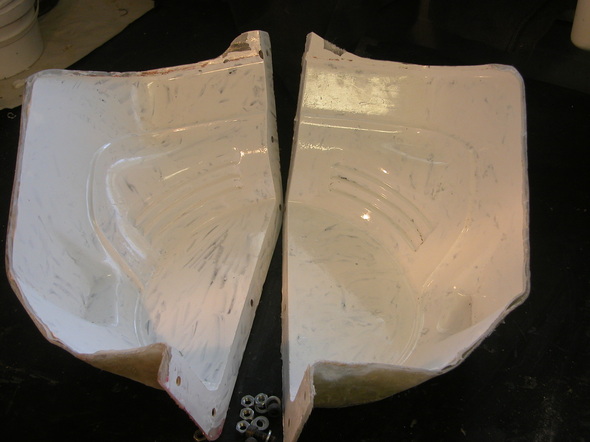
The mold separated from the plug easily. On reflection I'm not sure I needed to make the mold in two halves, but it's a lot of work to do and then discover it is hard or impossible to separate it from the plug. The film sticks to the mold and can be easily washed off with soap and water. The inside surface came out better than expected. There are small imperfections, but I figure I can fix that on the finished fairing.
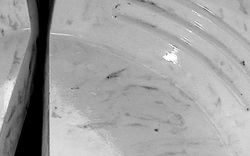
Mold inner surface. The dark marks are where the gel coat is thin. The actual surface is very good, edges very well defined.
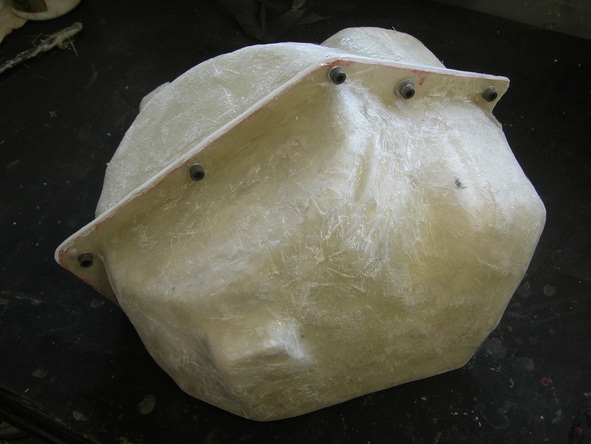
Outside of the mold to show how the halves bolt together.
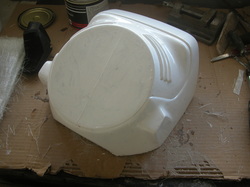
Success! This is before sanding and dressing. The line where the two halves of mold are joined is very noticeable, but it will be easily smoothed out. After I do that I'll decide if I want to cut vents. I will probably do it because it looks silly to have the ridges that serve no purpose.
Opening for the headlamp cut and the vent slots cut. Holes drilled to accommodate the turn signal lights.
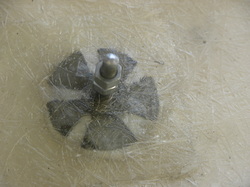
Mounting points on the inside of the fairing are fashioned from threaded rod welded to a mild steel disk. The disk is cut from 2mm sheet and about 30mm diameter. It is attached to the fairing by two layers of chopped strand over the disk. The wedges have been grinded to improve the bond to the fairing body and also to facilitate bending sections of the disk to fit the surface and get the threaded part at right angles to the surface.
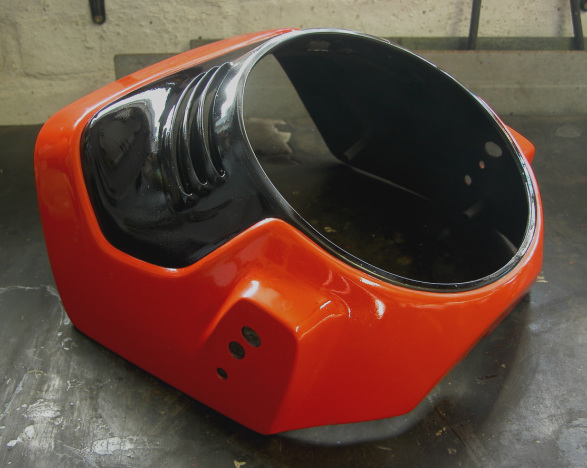
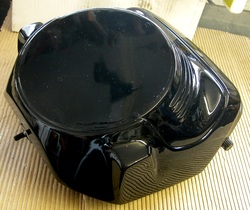
Finally done. I'm pleased with the result. I learnt a lot and the next one I make will be much easier. I added a drop of black and a sprinkle of pearl to the clear coat.
